Guide for compressing video files for upload to applications
For video files you intend to upload in support of you application you may need to compress the file first before uploading to meed out file size restrictions, this will also help when uploading as the file will be smaller and quicker to upload.
Video file upload restrictions:
- Videos should be no more than 2 minutes in length
- Videos should be under 150MB in file size
- Ideal formats are: mp4 preferably but we can also accept webm, m4a, mov
The following guide has been created to aid in compressing your video files
- How to Compress a Video with an Online Video Compressor
- How to Compress a Video on Mac
- How to Compress a Video on Windows or Linux
How to Compress a Video with an Online Video Compressor
The are a number of online video compressions tools which can help compressing your videos.
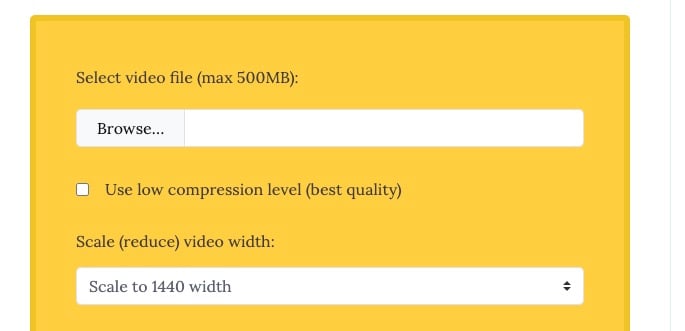
Option 1. Video Smaller
For mp4 videos which are already under 500MB this is the quickest and easiest option.
Steps:
- Visit the video smaller website
- Browse to find you file
- Select scale to 1280 or (720 for portrait video)
- Upload video
- Download video
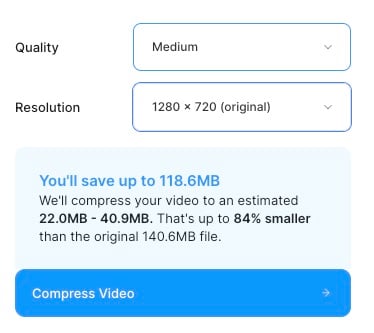
Option 2: Veed.io
Steps:
- Select compress a video
- Select upload file and find your video on your computer
- When the video is uploaded choose Medium Quality and 1280 x 720 resolution (720 x 1280 for portrait)
- Press compress video
- Download the file when it’s finished
How to Compress a Video on Mac
Using Quicktime player
As a Mac user, you will find Quicktime as a default installation on your device. It isn’t as feature-rich as the other tools in this guide, but it gets the job done. .
Here’s how to reduce video size on Mac:
Step 1: Open the Video File on the Software by Going to File Option.
Go to your Launchpad and search for Quicktime. It’ll launch a window with all your video files. Choose the one you want to compress and it’ll automatically open your video file in a new window.
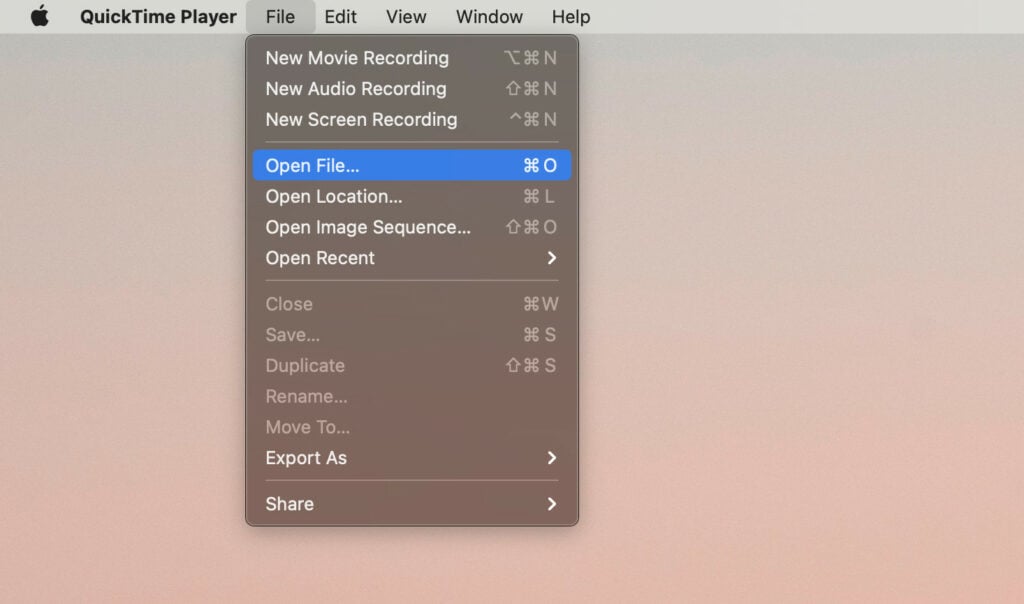
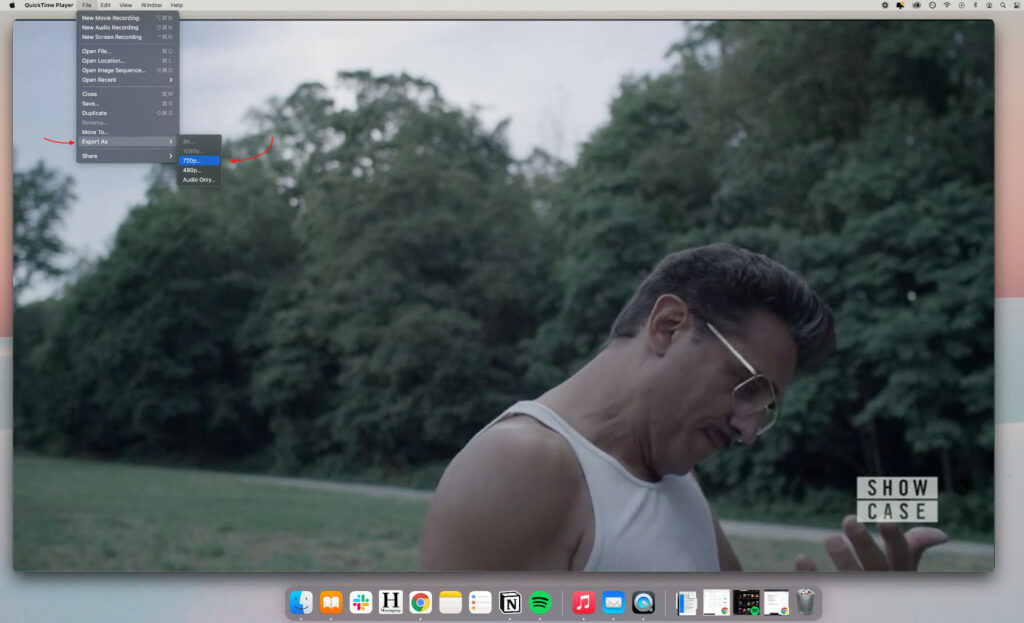
Step 2: Go to File > Export as and Choose the Resolution
Toggle over to the upper-left side of the screen and click on File. Then, select the Export as option and choose 720p.
Step 3: Finally, Export Your Video
Once you’ve selected the video resolution, you can choose the file location, name, and add tags if required. Hit Save and the compressed video file will be saved to your selected destination.
How to Compress a Video on Windows or Linux
VLC is a free media player and video compressor. You can use it on Mac, Windows, and Linux. If all you need to do is compress videos, this is the tool for you.
Here’s a step-by-step tutorial to reduce video file size using VLC:
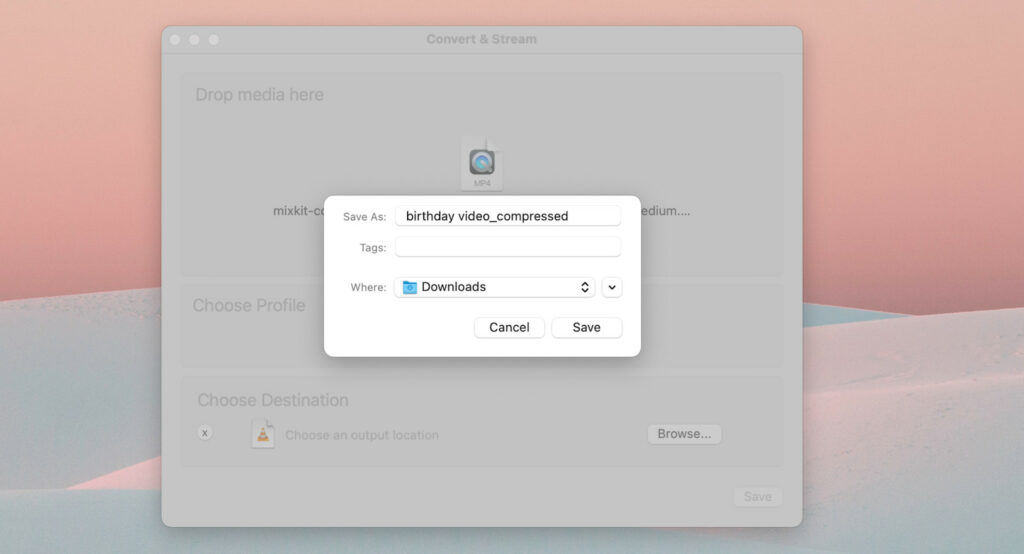
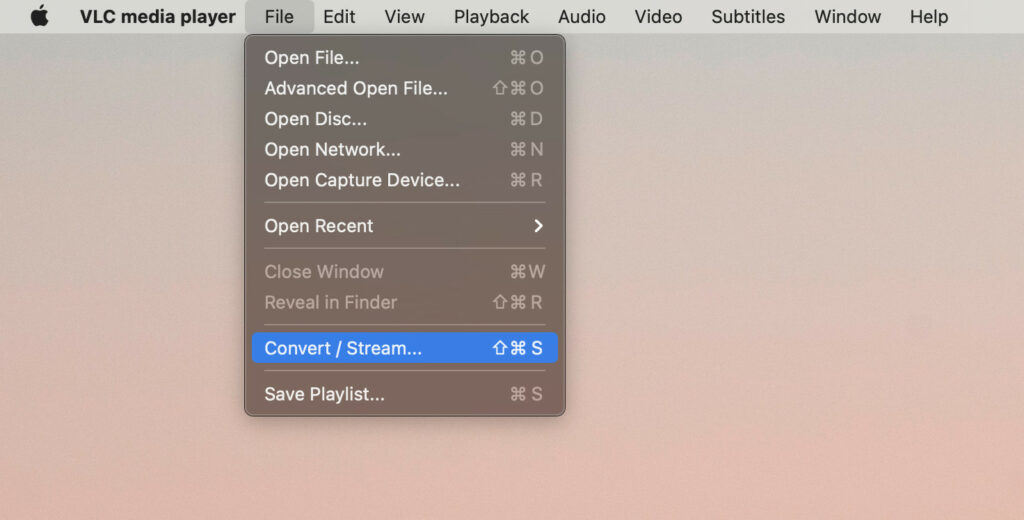
Step 1: Once You Install the Software, Go to File then Convert/Stream
Open VLC media player on your laptop and go to File. Then, click on the Convert / Stream option to compress your video file.
Step 2: Click Open Media and Select a Video File to Compress
Drag and drop your video file in the pop-up window or simply click on Open media and choose the video you want to compress.
Step 3: Once You Have Added the file Choose a Preset
Click on the blue button and scroll to select H.264 + Mp3 (mp4)

Step 4:
Click Save as file Name the File, and Choose a Destination File for Your Compressed Video.